Dynamic Text, Measurement and Decorations
Dynamic software is well suited for studying mathematical patterns. By investing numerical values, it is possible to make conjectures, conjectures that can later be proven as the final step of an investigation.
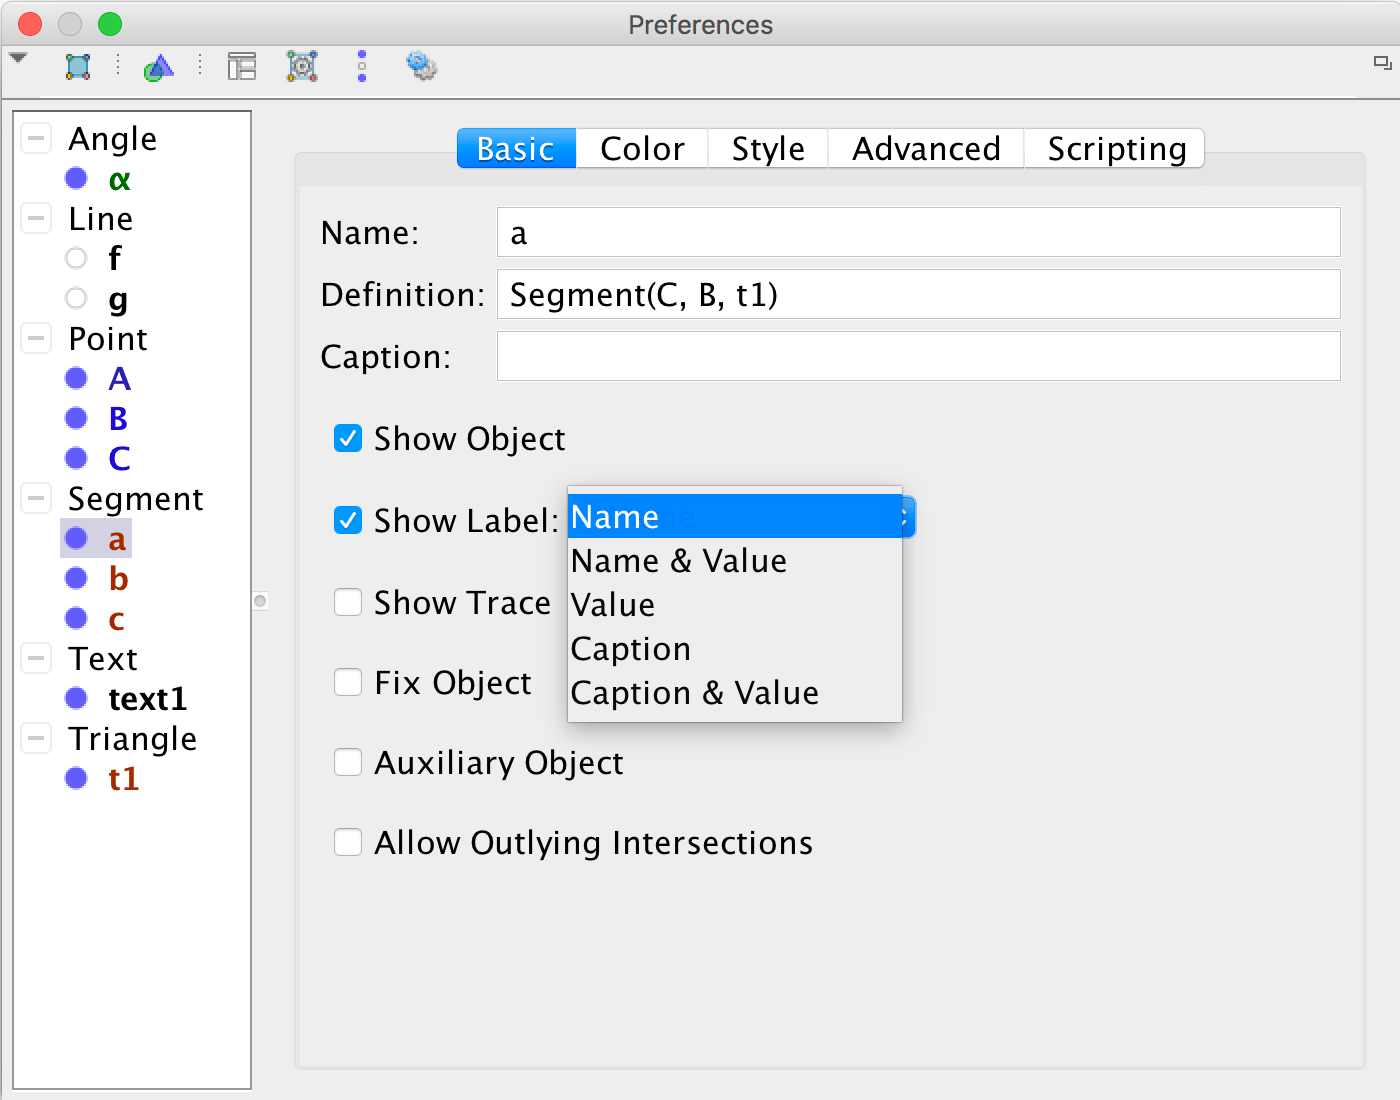
When trying to find a pattern, or when you as a teacher want to demonstrate a pattern, an easy approach is to show values in the algebra view, or to show values as labels attached to objects in the graphics view. You can choose what sort of label you want to display, right-click on an object and choose Object Properties.
It may be hard to see what's going on, and to see some sort of pattern, when merely studying labels or the algebra view.
For that reason, it is often a good idea to display values using dynamic text.
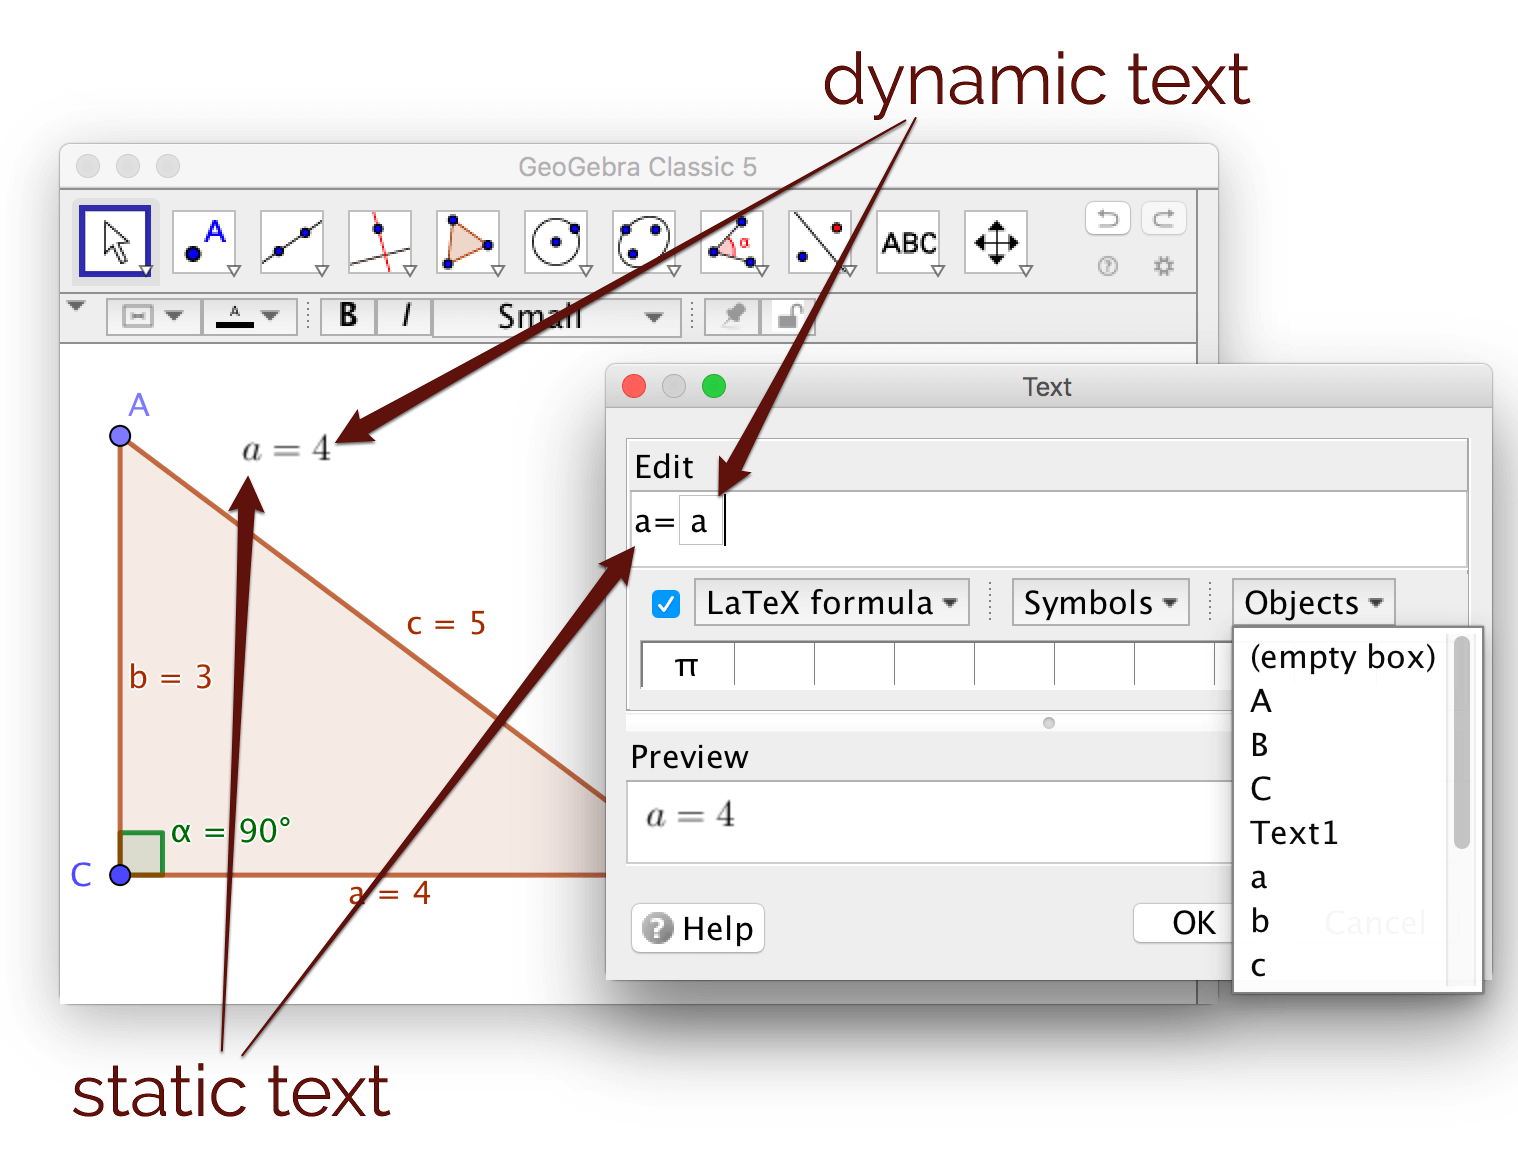
Static and dynamic text
To insert text, choose the tool Insert Text ![]() , then
click anywhere in the graphics view. If you want to show text displaying the value
of an object, click on the menu
, then
click anywhere in the graphics view. If you want to show text displaying the value
of an object, click on the menu Objects and pick an object. This object is shown inside a small box in the
edit area. When the value of the chosen object is changed, by dragging points, the displayed value is also
changed ‐ the displayed text is dynamic.
LaTeX in GeoGebra
The most well-known way to write mathematics is to use LaTeX and to use TeX-syntax for formulas. LaTeX is used by GeoGebra and you don't have
to know much TeX-syntax in order to use it. In order to use LaTeX when writing in a text box, check LaTeX formula. If GeoGebra recognizes what you write as TeX-code, the LaTeX formula check box is automatically checked.
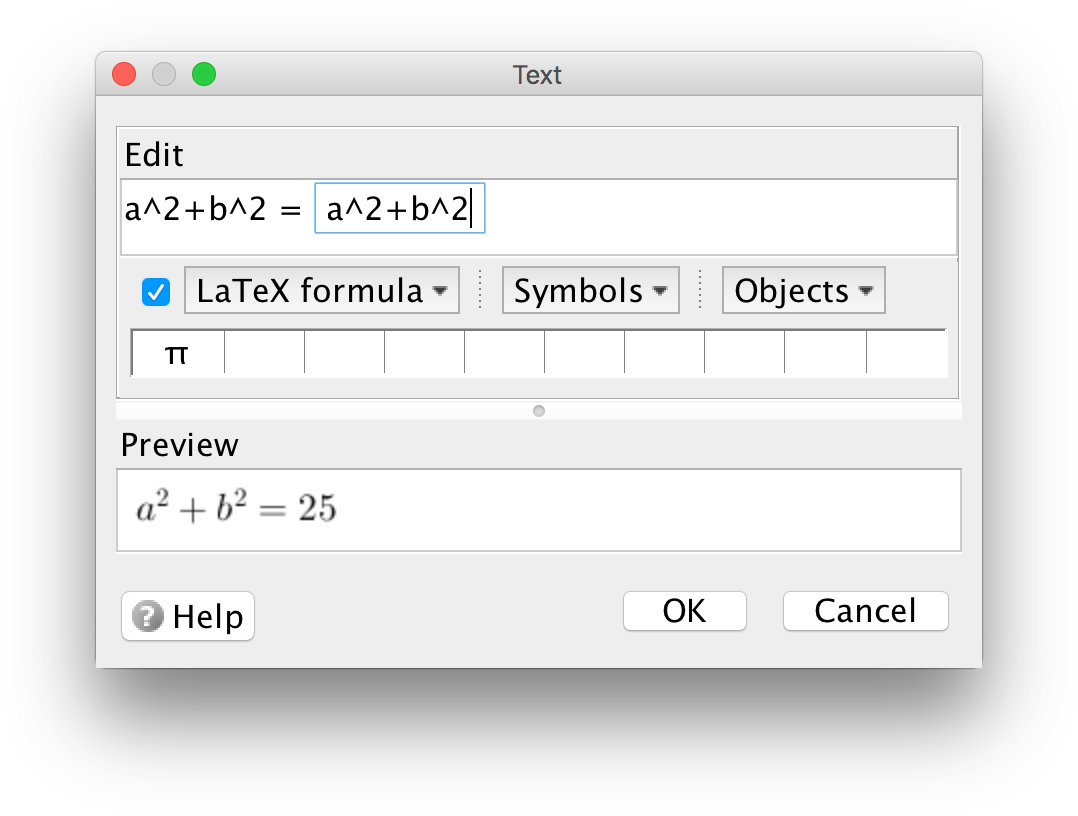
Even if you don't know LaTeX, or don't want to learn LaTeX, you should know how to write superscripts and subscripts
Superscripts are written using ^
x^2 is shown like this \(x^2\)
Subscripts are written using _
c_1 is shown like this \(x_2\)
The same symbols (^ and _) are used for variable names in GeoGebra. You write a ^ by pressing Shift+^. The character ^ may not show up
until you press the next character or spacebar. You write a _ by pressing Shift+
-.
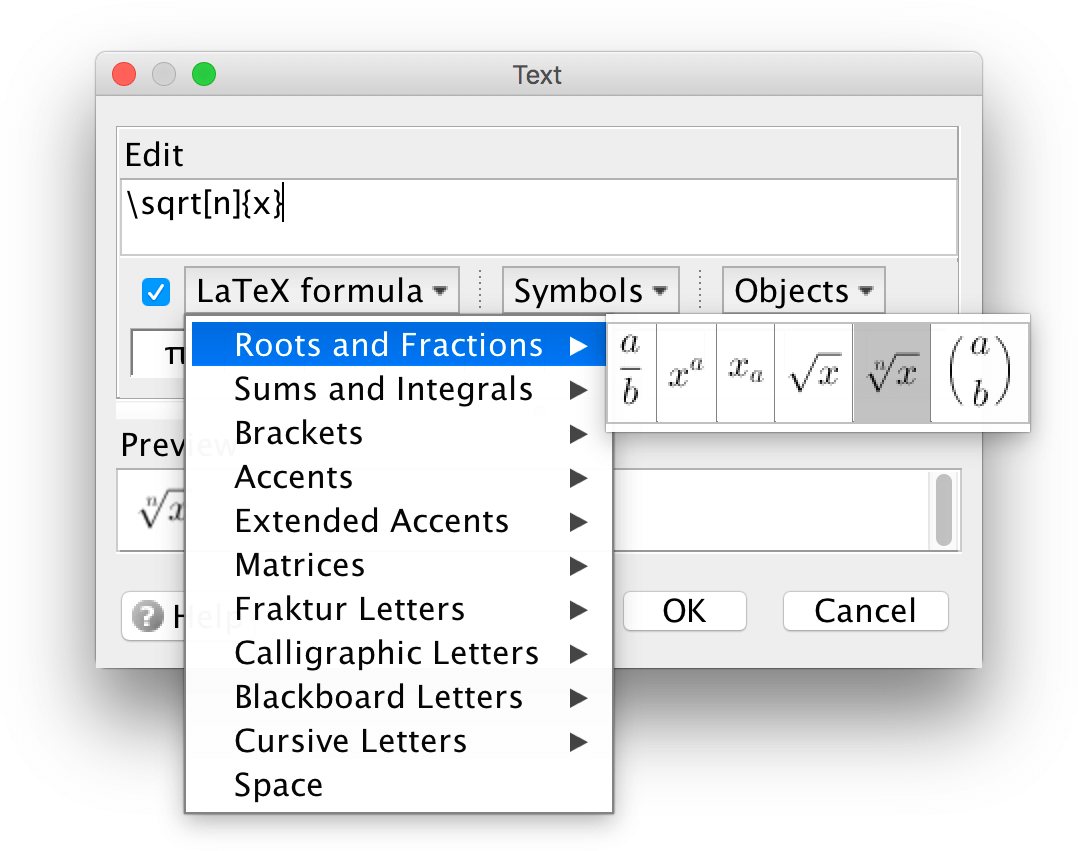
If you don't know LaTeX you can get some help from within the GeoGebra text box. Check LaTeX formula and choose the formula you want to display from the drop-down menu. Then exchange
the default characters to the character you want in your text.
Expressions of object values
When you want to display the value of an object, you click on the Objects-menu, choose an object, and then the object is displayed inside a small box. You can write expression inside this box, using object values.
Regular text and LaTeX
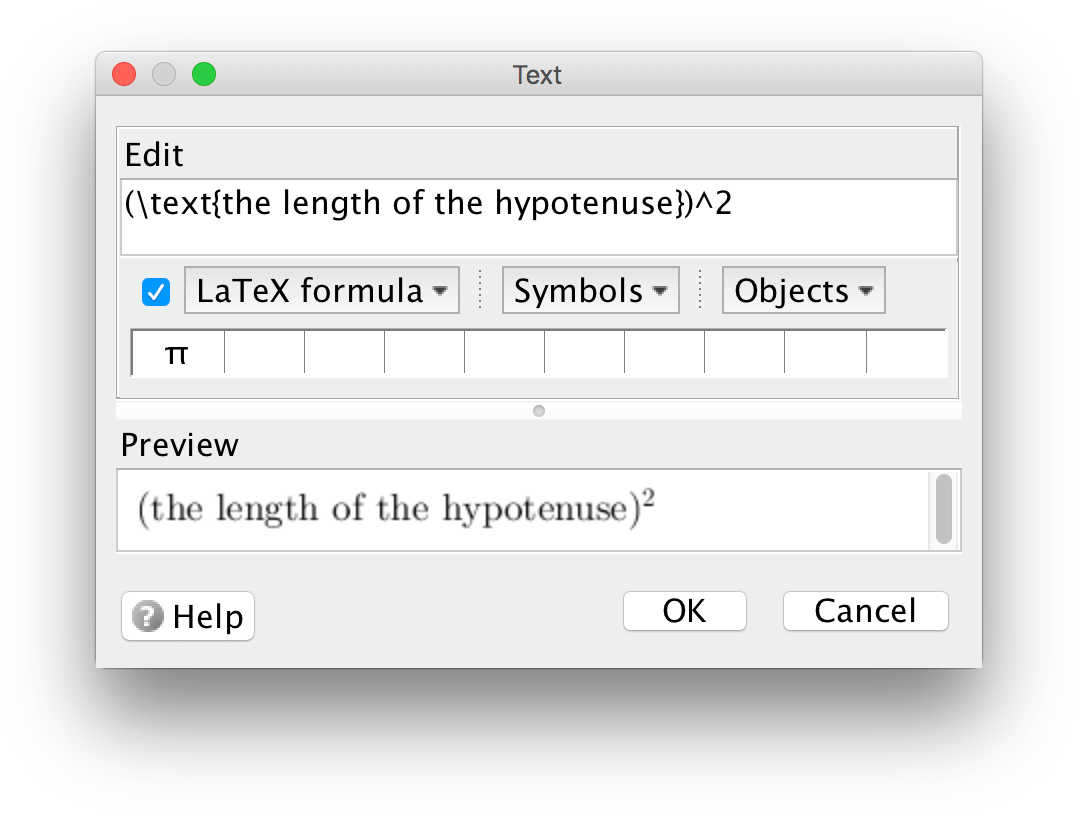
When writing a mathematical formula i LaTeX, characters are written in italics and spaces are ignored. For that reason, a LaTeX-formula may not be displayed the way you want.
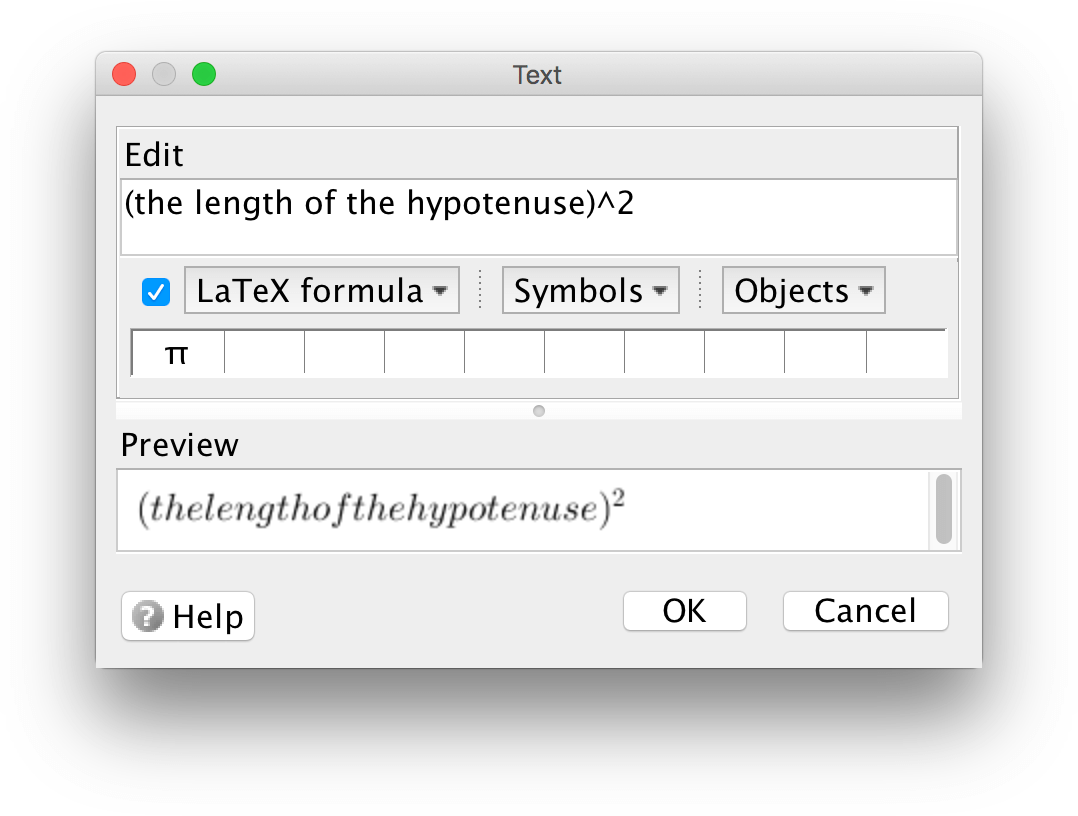
If you want text within a LaTeX-formula to appear as regular text, with white spaces and not in italics, enclose it within the curly brackets of the command \text{}.
Measurement
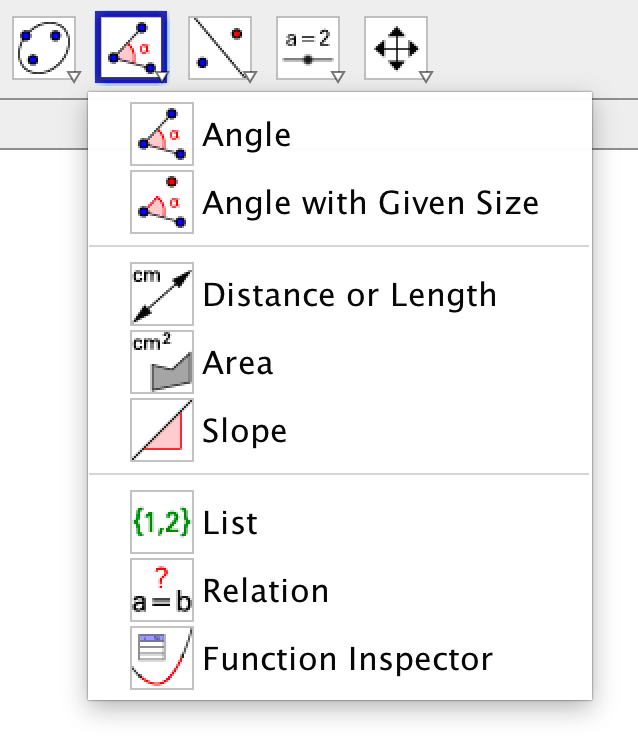
You can find various tools for making measurements in the tool bar.
Note that when hovering the mouse over a tool, you get a message about what objects are needed. When measuring an angle, you must either click on three points or two lines/segments.
Using these tools, you can measure, angles, areas, distances and slopes.
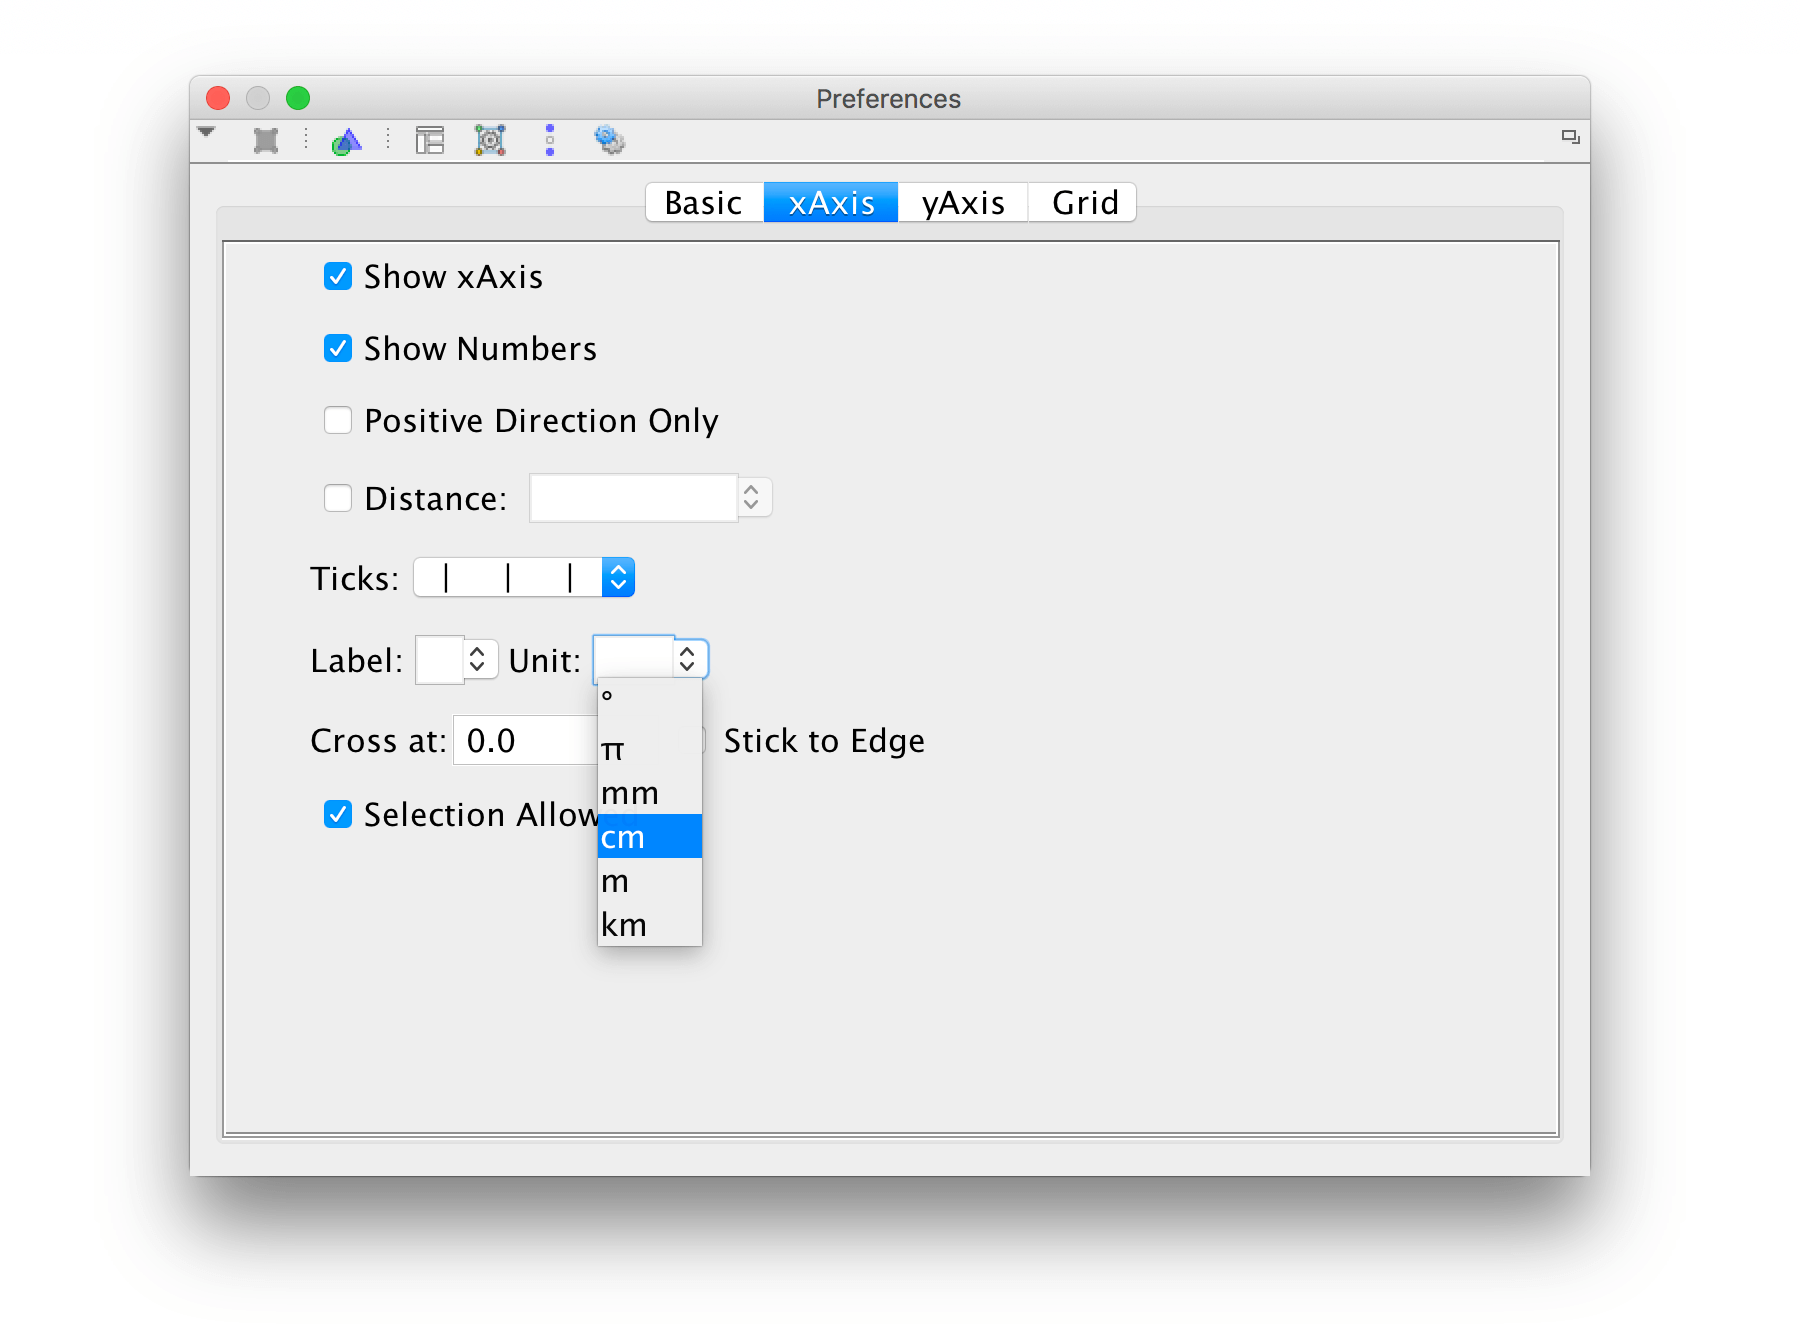
Units
You can show units on the axes. Click on the "Preferences" wheel-icon in the upper right corner and choose "Graphics".
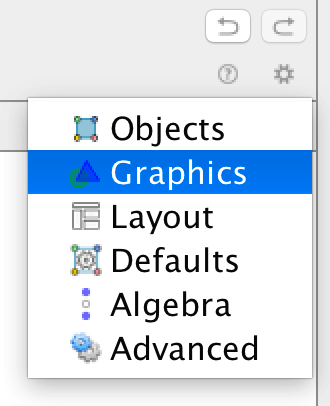
There is one tab for the x-axis and one for the y-axis.

Using a command
All the tools in the tool bar have corresponding commands that you can enter in the input bar. The commands act on various objects and these objects must be entered as arguments. You write the arguments within brackets.
All commands can be shown in a list if you click on the icon to the right of the input bar. If you click on a command, the arguments needed to use the command will be shown.
If you for example want to measure a distance, you write Dis; after doing so GeoGebra shows a list of
commands starting with Dis.
Choose a suggestion from the list using the arrow keys and click Enter. The command is written and the cursor is moved to
inside the brackets where you can fill in the parameters needed, i.e. the names of the points.
A variable holding the value of the distance is created and shown in the Algebra View. When using a command instead of a tool, no text box showing the value measured is created.
Measuring Angles
Angles are named using Greek letters in GeoGebra. When measuring an angle between three points, there are two different angles
that are possible depending on whether you click on the points in a counterclockwise direction or not. If you don't get the angle
you wanted, you can undo by either typing Cmd/Ctrl+z or by
clicking on the undo-icon ![]() at the top right corner.
at the top right corner.
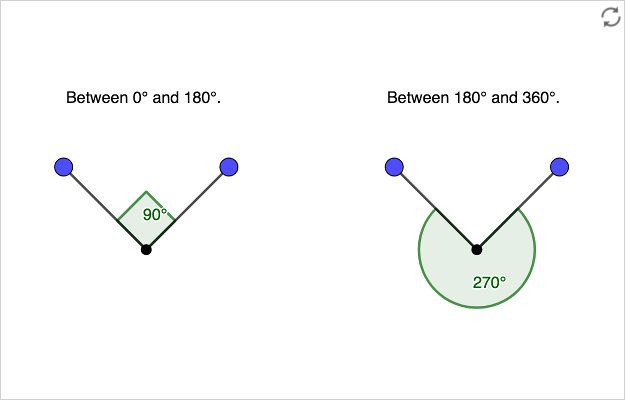
In the properties window, you can choose to always display angles within a chosen interval.
To write the degree symbol press Ctrl+O!
Apart from the regular object properties, such as color or size, you can also use decorations.
Decorations
When using GeoGebra for interactive worksheets, you can show relations between angles or segments by displaying their values. It is also possible to show equality by decorating angles and segments. This is especially useful when making static images.

You find the available decorations under the Style-tab in the Properties-window.
Exercises
Exercise 1
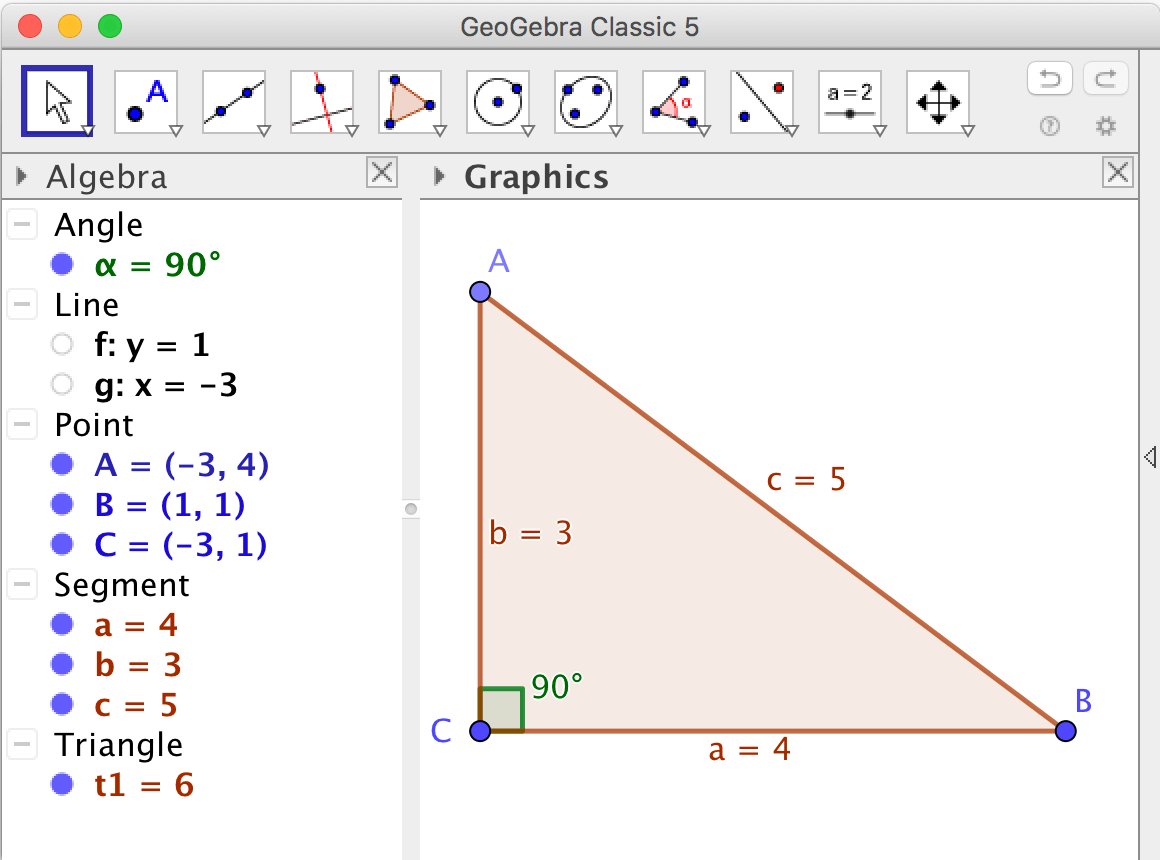
Make a demonstration of the Pythagorean theorem
Construct a right-angled triangle using the tools:
 Line
Line  Perpendicular Line
  Point
Point  Polygon
 Make sure that your construction passes the dragging test and hide objects that shouldn't be visible.
- Rename the sides of the triangle so the shorter sides are called \(a\) and \(b\) and the hypotenuse \(c\). Also mark the right-angled angle using the tool
 Angle.
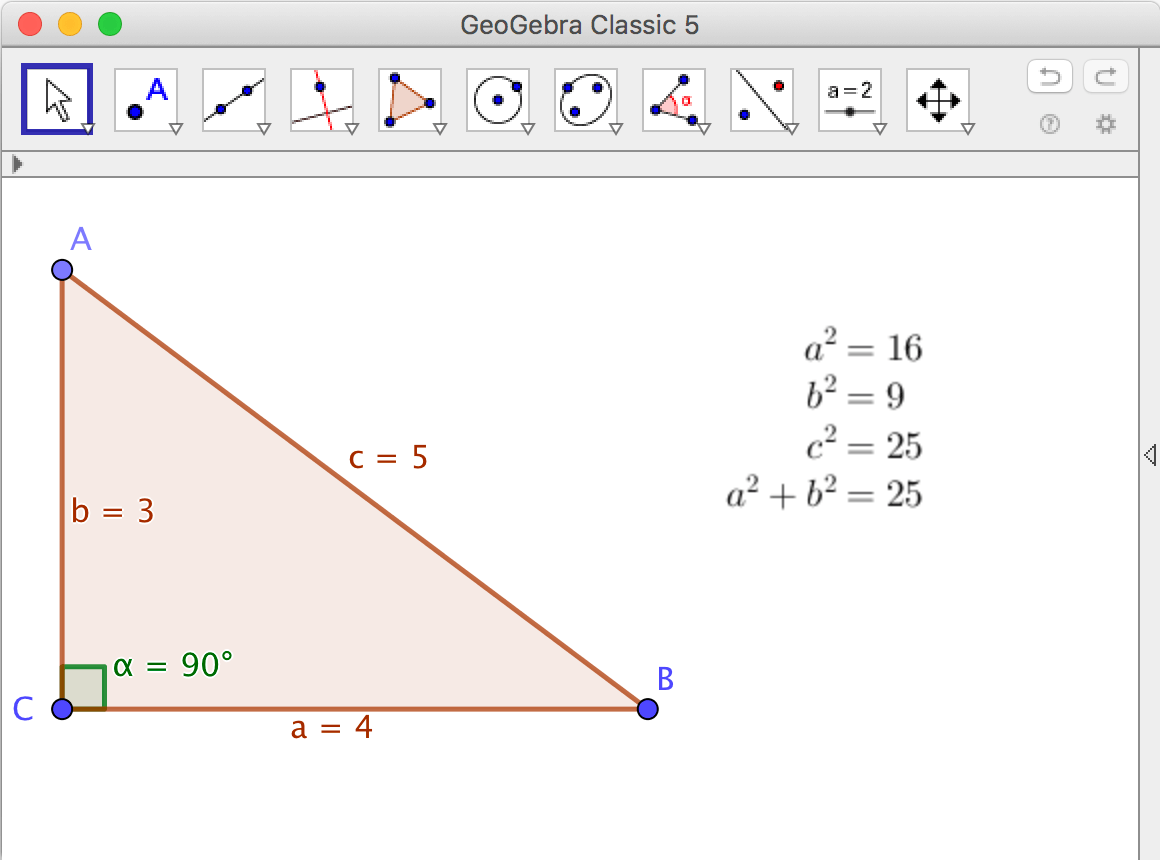
 - Use dynamic text to display numerical values indicating that the Pythagorean theorem possibly could be true.
Comment: This construction offers no help at all understanding why the Pythagorean theorem is true. It is also possible to make constructions that works as explanations. Two such examples are shown at Geometry ‐ Pythagoras & Thales.
Exercise 2
Demonstrate the relationship between the central angle and an inscribed angle.
Make a circle using the tool ![]() Circle with Center and Radius. Place three points on the circle. Use the tool
Circle with Center and Radius. Place three points on the circle. Use the tool ![]() Angle to show the inscribed and the central angle. Add dynamic text to demonstrate the relationship. Drag the three points!
Angle to show the inscribed and the central angle. Add dynamic text to demonstrate the relationship. Drag the three points!

Comment: Since this construction is rather easy it is also a good example of a task suitable as a student task rather than a teacher demonstration.
by Malin Christersson under a Creative Commons Attribution-Noncommercial-Share Alike 2.5 Sweden License