Get started with GeoGebra
You can download GeoGebra or run it online at https://www.geogebra.org/.
If you want to run it online you can either pick a special purpose app below the New Math Apps or use the general purpose app GeoGebra Classic. When running it online you can choose language under the Language menu.
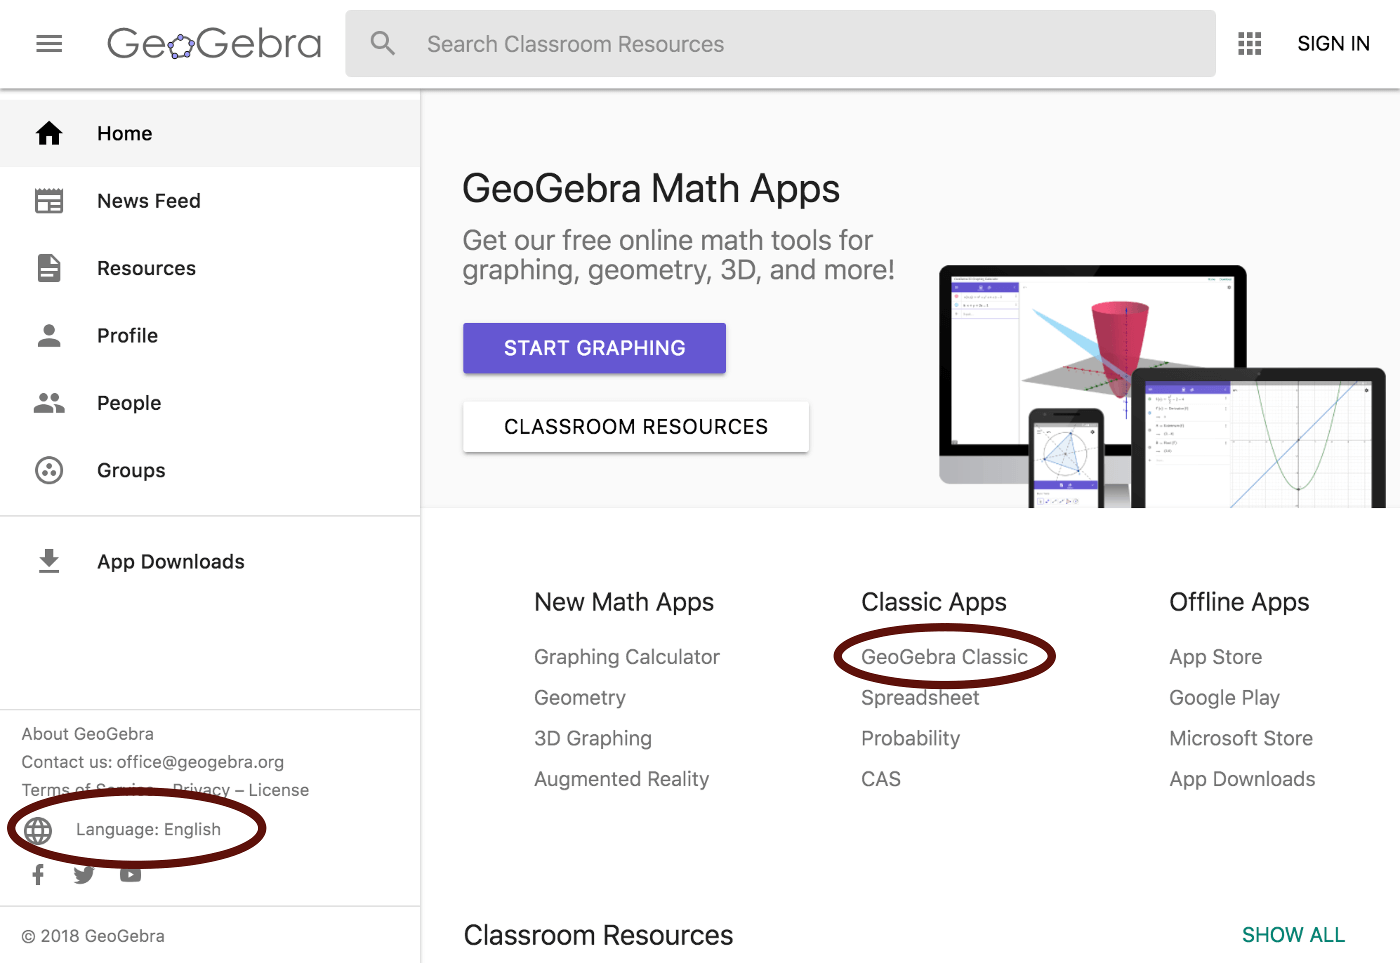
You can download GeoGebra under Offline Apps. There are two downloaded version of GeoGebra: GeoGebra Classic 5 and GeoGebra Classic 6.
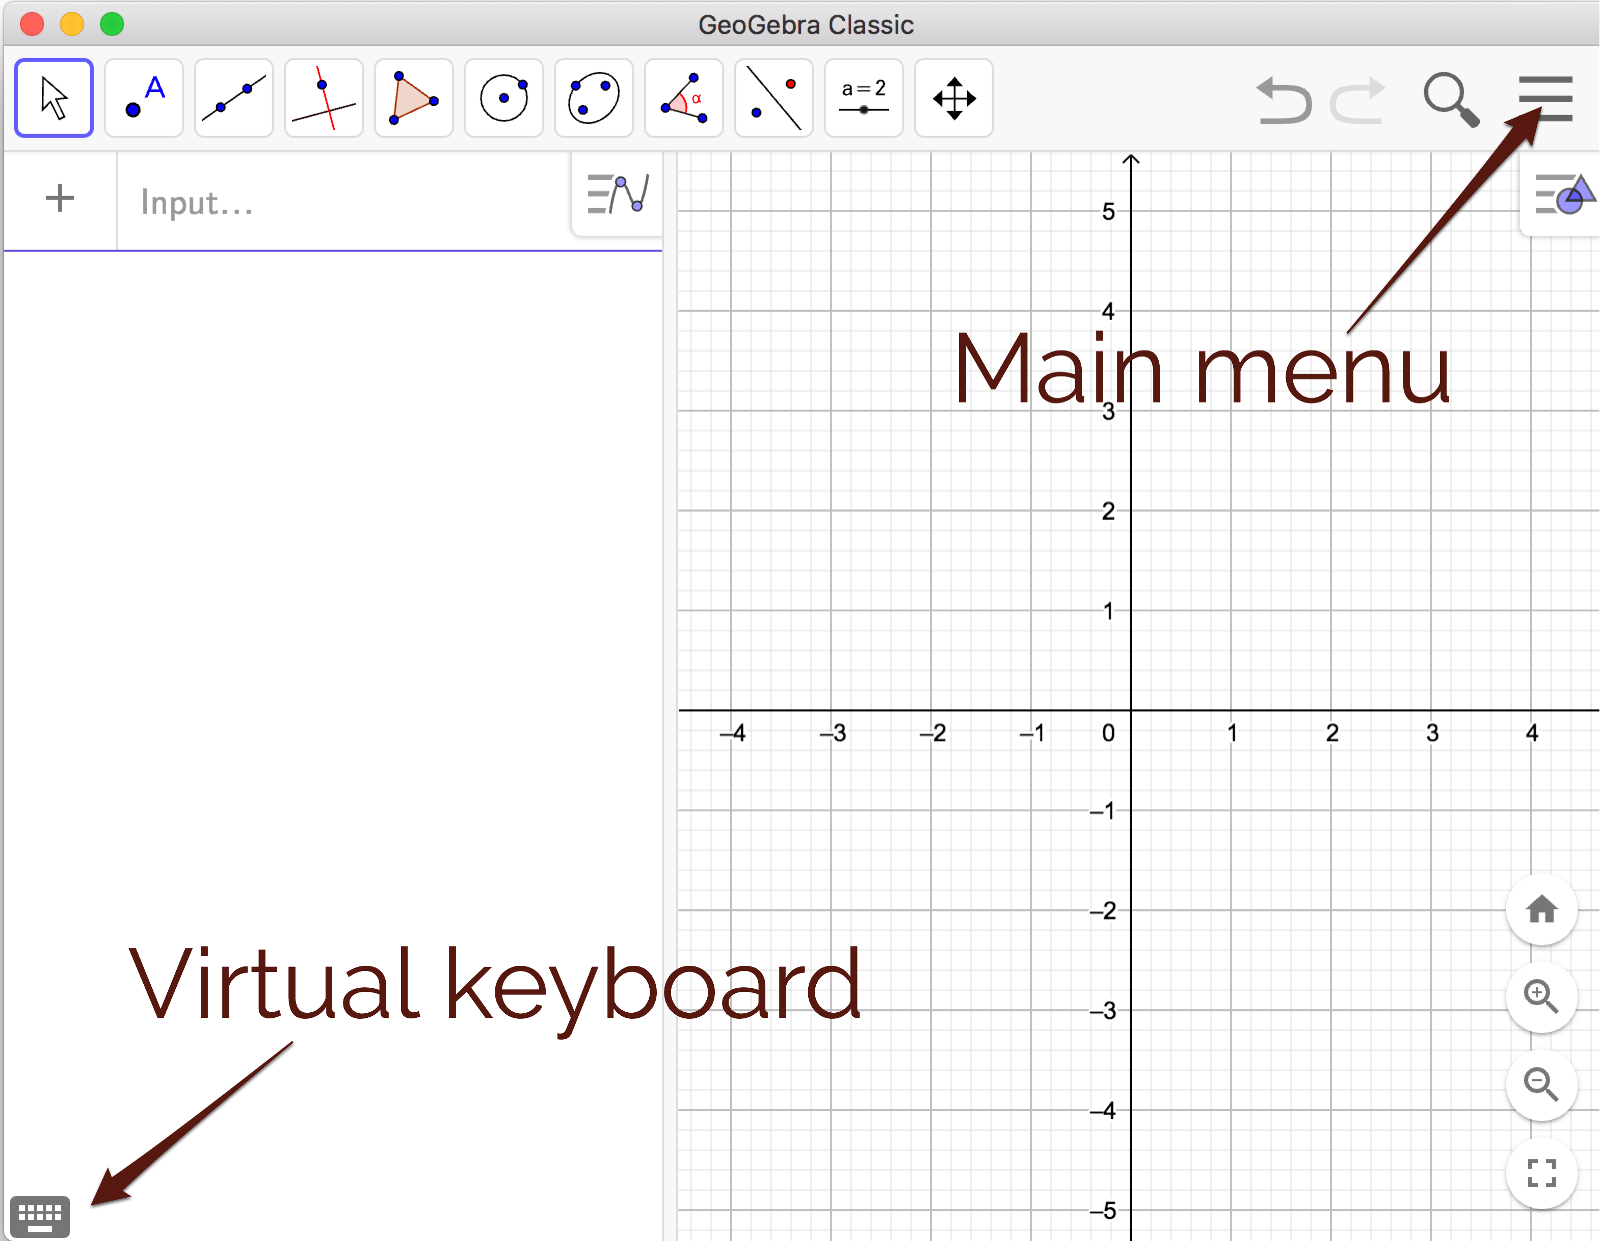
If you use a mobile device you should use GeoGebra Classic 6 which has a virtual keyboard and features suitable for mobile devices.
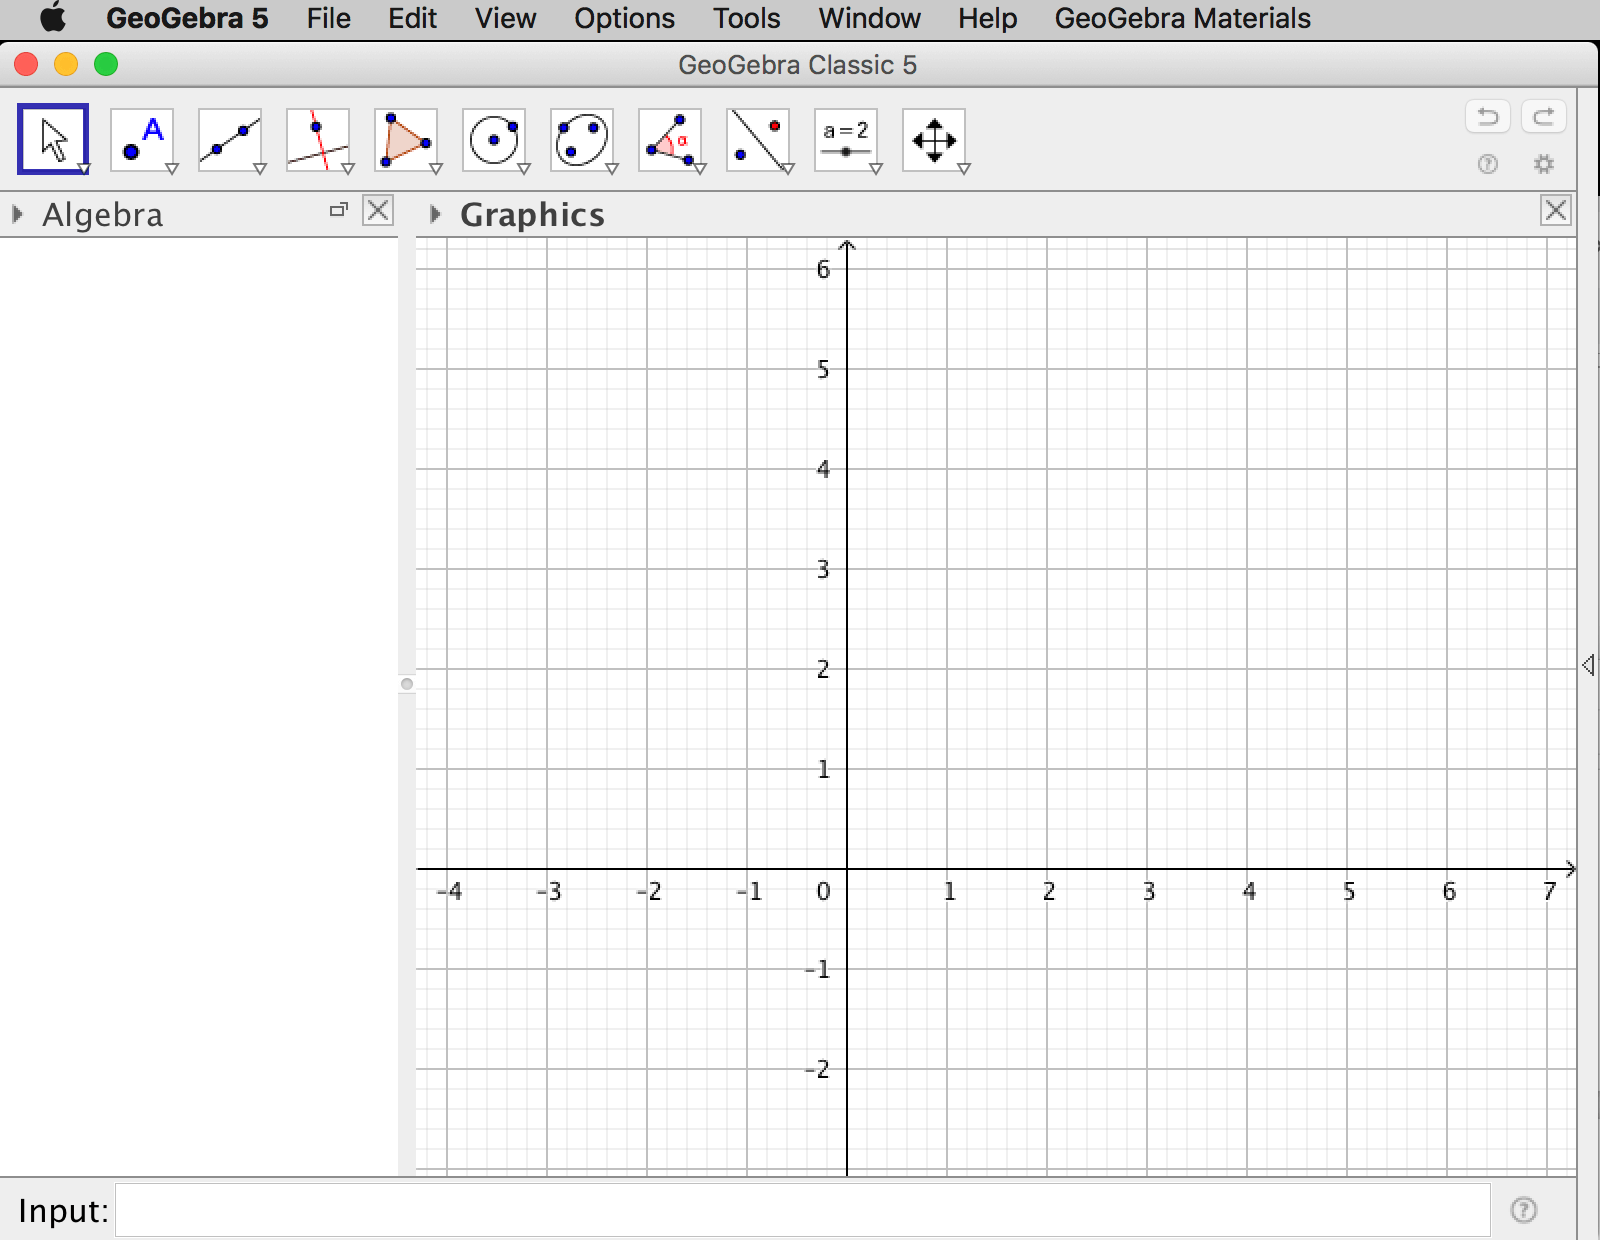
The examples on this web site are made using GeoGebra Classic 5, the regular computer desktop version.
When using GeoGebra Classic 5 or Classic 6 you can change language under Options in the main menu.
GeoGebra's web site also has an excellent forum.
For troubleshooting and getting access to older versions, see Reference: GeoGebra Installation FAQ.
If you want your students to use GeoGebra during exams, you should check out GeoGebra Exam Tutorial.
GeoGebra Resources
The main feature of GeoGebra is interactivity. Since static documents cannot capture the spirit of GeoGebra, and since most teachers/students don't have a web site of their own; it is possible to post your working to the GeoGebra web site. The material shared is a so called GeoGebra worksheet.
In order to share your worksheets to the GeoGebra web site, you must either register to make a GeoGebra user account, or use an existing Google, Facebook, Microsoft or Twitter account. If using the downloaded version of GeoGebra Classic 5 you can upload your worksheet to the GeoGebra web site by choosing File->Export
from within GeoGebra. Once posted, you can share it by providing a link to your GeoGebra user profile, like this:
https://www.geogebra.org/u/malinc.
If you choose to share a worksheet as Public, anyone can use it and make a copy of it.
Areas of use for teachers
GeoGebra is useful for many situations when teaching mathematics. Some common areas of use are described below.
Teacher demonstrations
When introducing new mathematical concepts, relations, or theorems, in some cases it is more efficient to use a GeoGebra worksheet than to visualize by drawing on the white board. If you want the students to have access to the worksheet after the lesson, or if you want the students to use the worksheet during the lesson, you can upload it to the GeoGebra site and hand out a link. Worksheets on the GeoGebra web site are shown as interactive tasks including instructions.
When using GeoGebra for demonstrations it is you as a teacher that must know how to use GeoGebra. For that reason, you don't have to teach the students how to use GeoGebra. For novices, making demonstrations is a rather easy way to get started with GeoGebra. If everything is made before the lesson, you as a teacher don't have to improvise and show your knowledge about GeoGebra during the lesson.
Student activities
You can let the students use GeoGebra for mathematical problem solving, to make mathematical models, or to make mathematical investigations when introducing new concepts. A student activity can be organized as a longer experimental activity or as a shorter task during any traditional lesson.
Student activities can be based on worksheets you as a teacher have done beforehand or it can involve students using GeoGebra themselves. If the students are to use GeoGebra themselves, you get a more student-centered lesson but you also risk that the lesson degenerate into a lesson about how to use GeoGebra rather than a lesson about mathematics. If you plan to let the students use GeoGebra themselves, you must also spend some time teaching them GeoGebra.
Creating images
As a mathematics teacher you must be able to create images to be used on tests, exams, written assignments, presentations, or web-based resources. GeoGebra is an excellent tool for creating images in this context. Choose File - > Export - > Graphics View as Picture.
For regular documents, made using some word processor, the png-format works well.
For images on the web, it is preferable to use the svg-format (Scalable Vector Graphics) which is vector based and hence yields the highest possible resolution when scaled. (The background to this section is a svg-image. Zoom in!)
If you want to use images made using GeoGebra in a LaTeX document, you get the best resolution by letting GeoGebra generate PGF/TikZ code. The code can be copied and pasted into the LaTeX document. This is how you insert PGF/TikZ code into Latex:
- Add following lines into the header of the LaTeX file:
\usepackage{pgf,tikz} \usepackage{mathrsfs} \usetikzlibrary{arrows} - Choose
File - > Export - > Graphics View as PGF/TikZfrom within GeoGebra. - Click on
Generate PGF/TikZ code. - Copy the code between
\begin{document}and\end{document}. Paste it into the LaTeX document, within afigureenvironment or similar.
An overview of GeoGebra
There are two views shown by default when you start GeoGebra, the algebra view and the graphics view. In the upper right corner of each view there are icons to show the view in a new window or to close the view.
You can find all views under the menu Views.
The program has a user-friendly design which lets the user try it out by clicking on icons to create objects. Every object can also be created by writing a command in the input box.
The tool bar
Each icon in the toolbar will show a drop-down list of tools if you click on the small arrow in the lower right corner of the icon.
Each tool will let you enter an object in the graphics view, the toolbar help describes what is needed to make the object. If the toolbar help gives the hint to "select a point", you can either select an existing point by clicking on it, or click anywhere in the graphics view to make a new point. Some objects require other existing objects; as an example, you cannot make a parallel line if you don't already have a line in the graphics view.

As long as a tool is selected in the toolbar, clicking in the graphics view will make a new object. Select the
Move-tool ![]() to move an object (it takes a while for beginners
to get used to this).
to move an object (it takes a while for beginners
to get used to this).
Use the Move-tool to move an object!
Properties
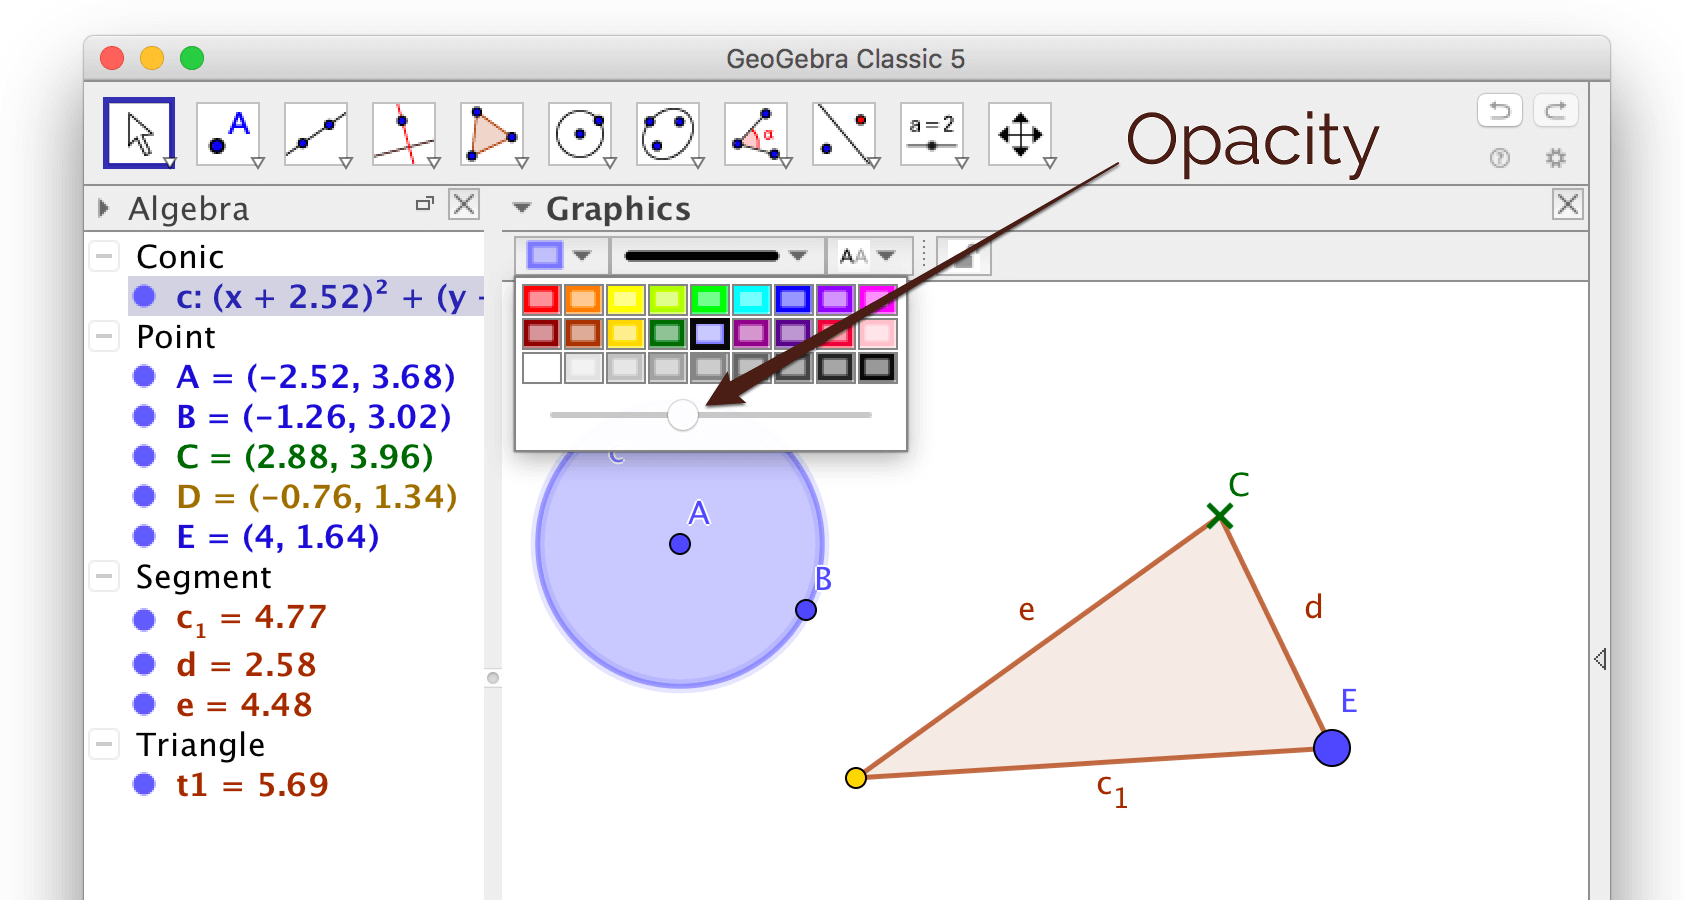
All objects have properties that you can change. The most common properties can be changed by using the styling bar. If no object is selected, the styling bar will show common properties for the graphics view. You toggle the styling bar by using the styling bar icon in the upper left corner of the graphics view.
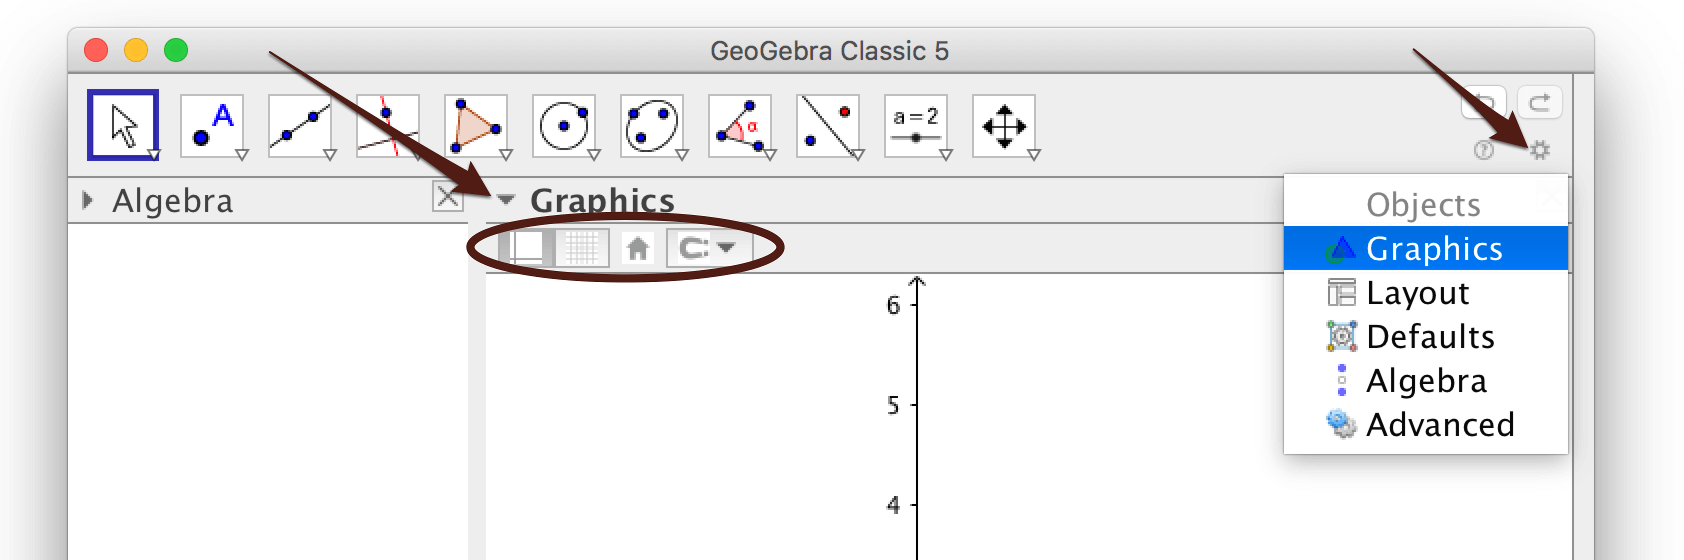
If you want to change the details of the coordinate system, click on the small wheel in the upper right corner and choose "Graphics". In the window that pops up, you find all the properties of the graphics view.
When an object is selected, the styling bar for that object will be shown. In order to change the styles of the points defining a circle, you must first select a point. Note that the opacity of circles is set to 0 by default, i.e. they are transparent. You can change the opacity in the styling bar.
If you want to see all properties of an object, start by selecting it, then right-click and choose
Object Properties; the Object Properties window will pop up.
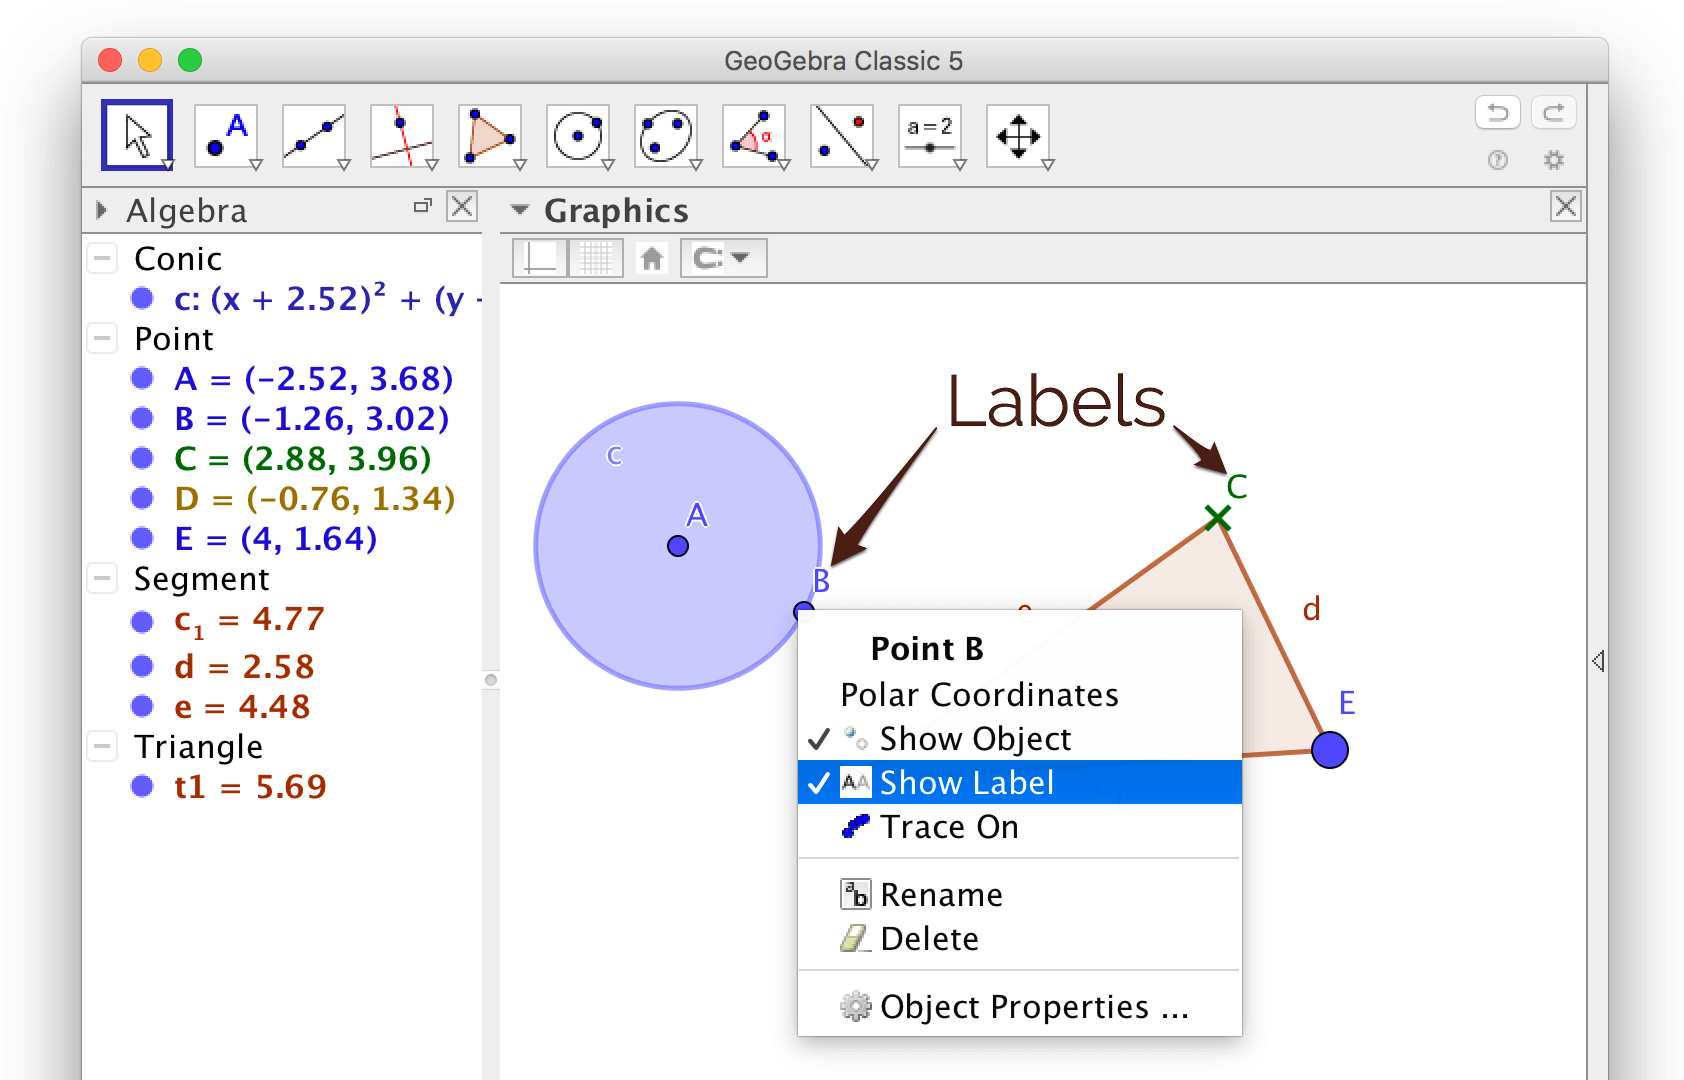
Names and labels
Each object in GeoGebra is given a name (you can name it yourself or change the given name). The names of all objects are shown in the algebra view.
If the algebra is shown when creating an object, the label will be shown by default. If you don't want to show any labels, close the algebra view!
After an object has been created you can choose to show or hide the label. Right-click on the object or use the styling bar.
Handle many objects
If you for instance want to hide all points, you can select all points by clicking on the heading Point in the algebra view. Then right-click on the selection and uncheck Show object.
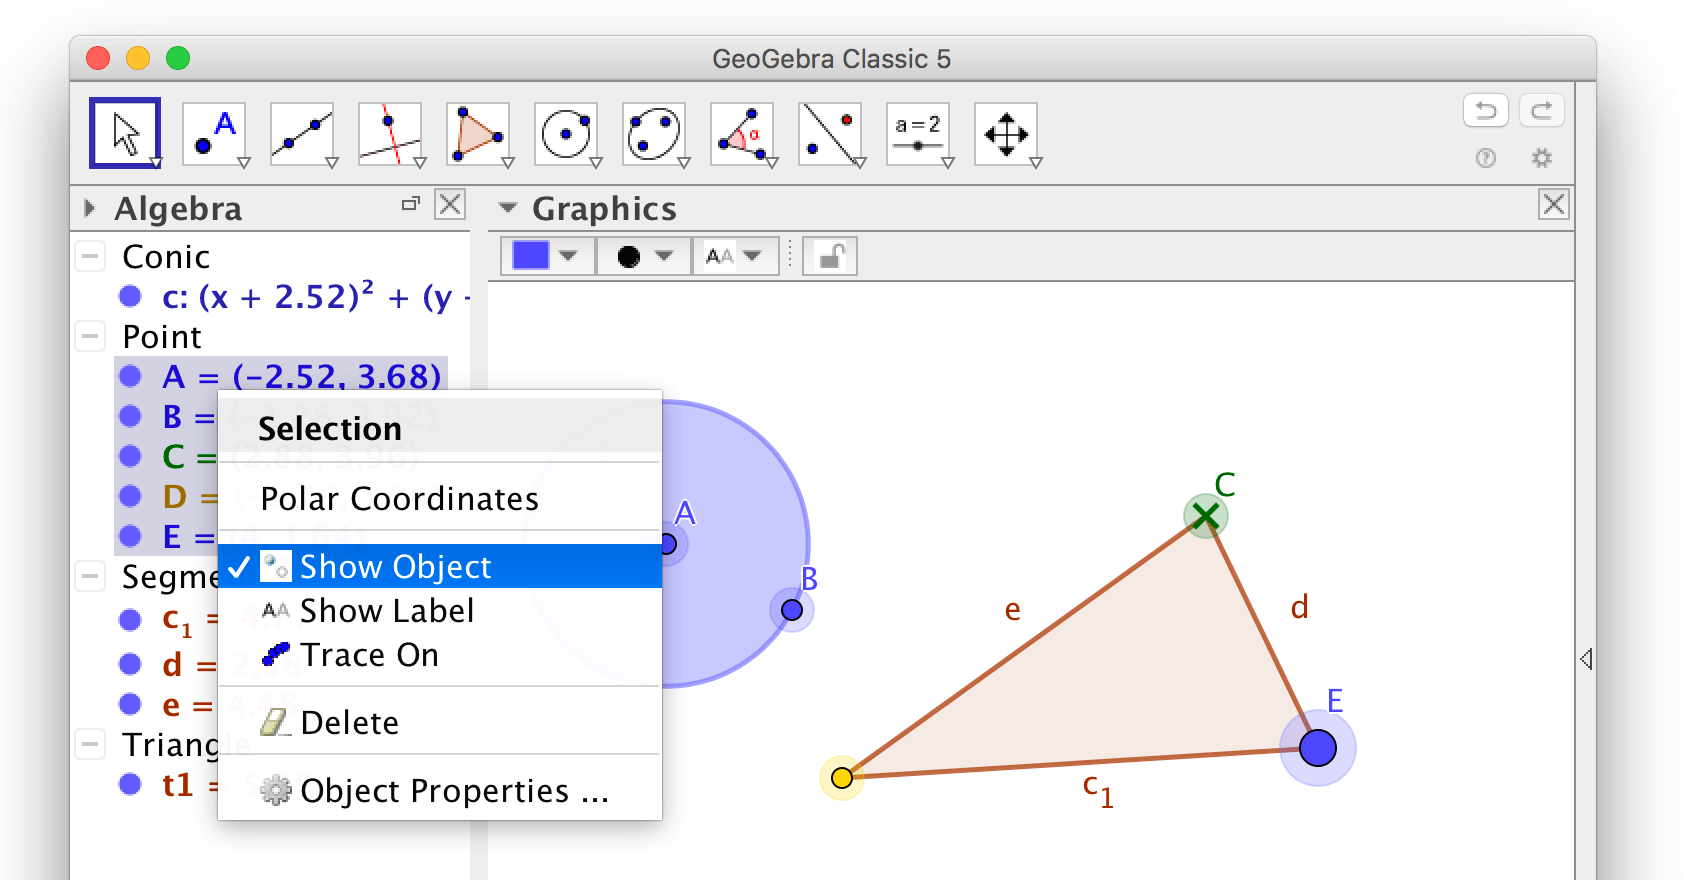
You can also select many objects by holding down Shift while selecting objects in the algebra view.
Exercises
The main feature of GeoGebra is not to use it as a tool for making pictures, but rather to use it as a tool for making dynamic constructions. In order to learn GeoGebra however, it may be a good idea to start by making pictures.
Exercise 1
Create, change and delete objects
Check out how to create objects. Make sure you know how to create following objects:
- Circles in two different ways; use the tools
 Circle with Center through Point and
  Circle with Center and Radius.
 - Polygons in two different ways; use the tools
 Polygon and
  Regular Polygon.
 - Perpendicular and parallel lines.
- Reflections in lines.
- Intersection points.
Also make sure you know how to:
- change the appearance of the objects you created and how to move them around,
- change the appearance of the graphics view,
- show text in the graphics view.
Also try to:
- regret by clicking ctrl+z or cmd+z, or by using the icons in the upper right corner of the GeoGebra window,
- zoom in and out using the mouse wheel or trackpad.
Exercise 2
Make a self portrait
When you are done, hide all objects that shouldn't be visible. Under the advanced tab in the properties window, you can choose a Layer for an object. Using layers, objects can be drawn "above" other objects.

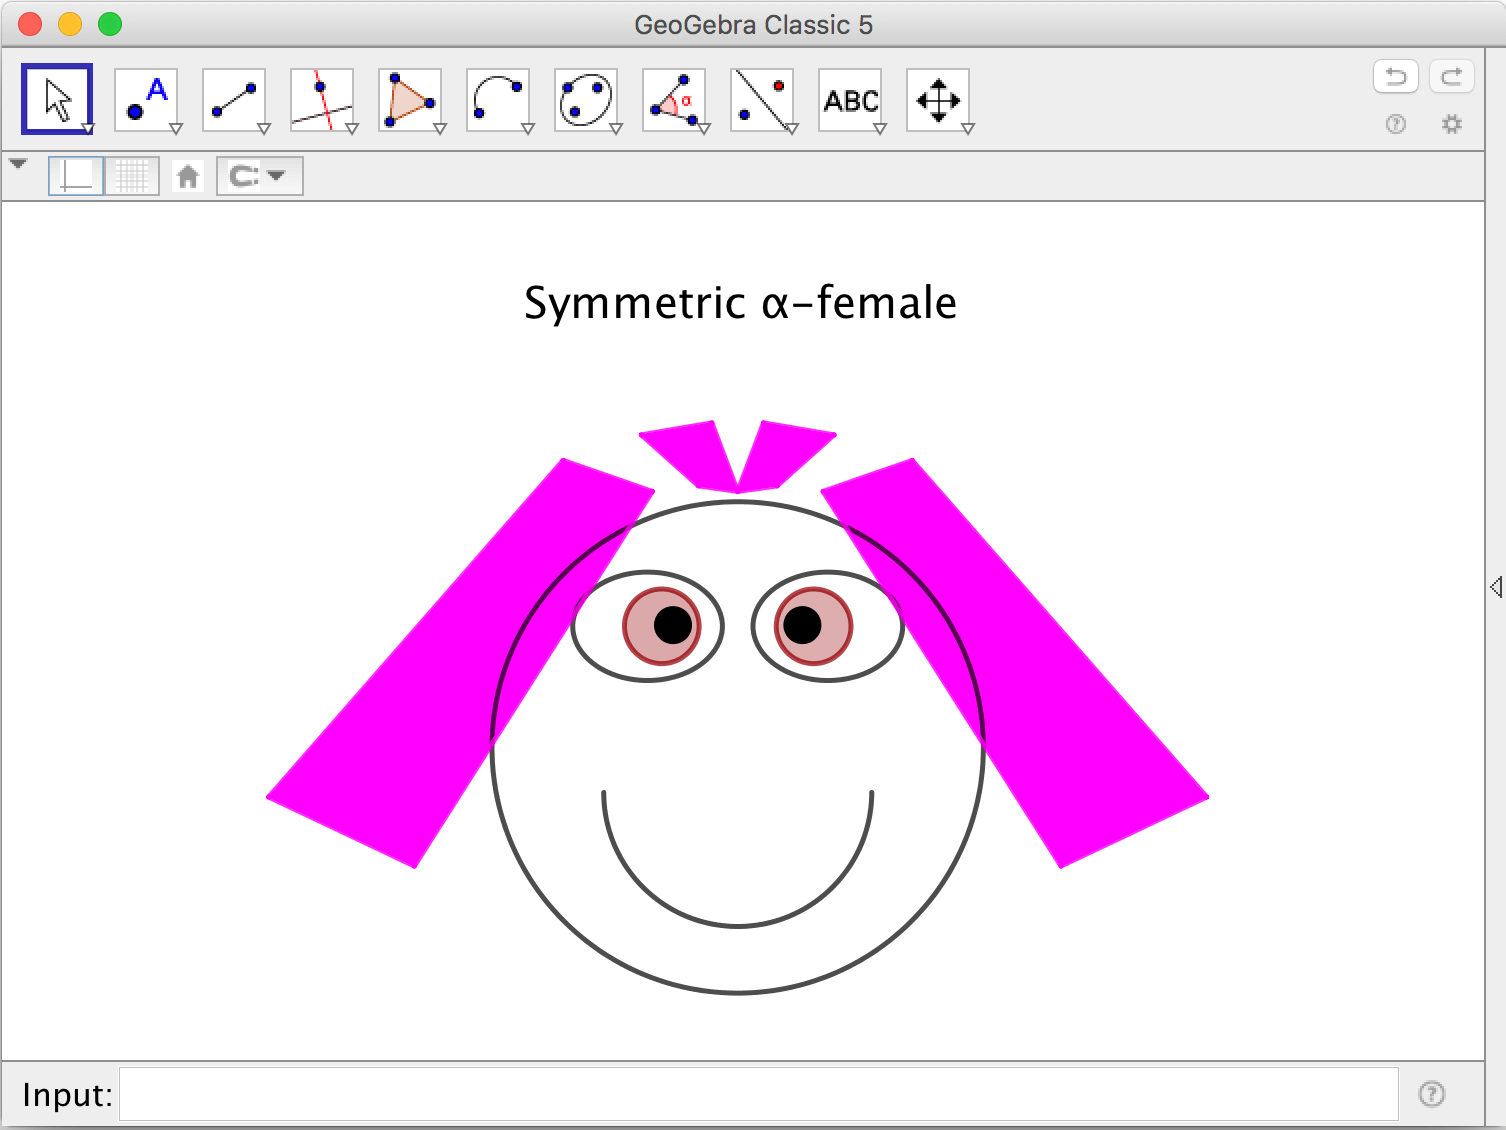
Exercise 3
Make a symmetric self portrait
In order to make a symmetric portrait; make half of the face on one side of the y-axis, then use the tool ![]() Reflect about line, using the y-axis as line of symmetry.
Reflect about line, using the y-axis as line of symmetry.
Exercise 4
Sliders
- Make a slider a using the tool
 Slider and a circle having a as radius. Use the tool Circle with Center and Radius.
 - Make a slider n of integer values and make a Regular Polygon having n vertices.
- Make a slider \(\alpha\) representing an angle. Make a polygon and a point not on the polygon. Use the tool
 Rotate around point to rotate the polygon around the point \(\alpha\) degrees.
by Malin Christersson under a Creative Commons Attribution-Noncommercial-Share Alike 2.5 Sweden License